Custom textures tutorial (SLADE)

This tutorial will teach you how to create custom textures in SRB2 using SLADE as a lump editor.
Introduction
There are two ways of creating textures in SRB2: One way is to simply import the image that you want to use as a texture into your WAD or PK3 file and convert it to Doom's graphics format. If you are using a PK3 file, you must place these single-image textures in the Textures/ folder to make the game recognize them. If you are using a WAD file, you must place them between two marker lumps, TX_START and TX_END.
While this method can generally be used for all textures, it is sometimes useful to combine a texture out of several images, for example if it has repeating patterns or if it shares parts with another texture. Textures that are combined out of several images are called composite textures, and they can be defined in a special text lump called TEXTURES. The individual images in a composite texture are called patches. You can either use already existing single-image textures as patches or place additional patches in your WAD or PK3 file. For easy navigability, it is recommended that you store these patches in the Patches/ folder (if you are using a PK3 file) or between the marker lumps P_START and P_END (if you are using a WAD file). However, this is not strictly necessary.
To prevent conflicts, never use a name for a composite texture that is already in use as a patch. Likewise, never use a name for a patch or texture that is already used in SRB2 or your own WAD or PK3 file, unless you want to replace an already existing patch/texture.
Single-image textures

To import single-image textures, first consider the type of file you are using.
- If you are using a PK3 file, you need to create the
Textures/folder. The folder must be at the top level of the folder structure, so if you are already in another folder, navigate back to the top. Then, click Archive → New → New Directory in the menu bar and type inTexturesas the name. Now double-click on the newly created folder to enter it. - If you are using a WAD file, you need to add the
TX_STARTmarker. To do this, click Archive → New → New Entry in the menu bar and type inTX_STARTas the name. You should now see a new lump with the file type "Marker".
Now you can import the images. Click Archive → Import Files in the menu bar, browse to the folder where your images are located, select them and hit Enter. The name of a texture lump must have eight characters or fewer and should be uppercase, so rename the lumps if necessary by right-clicking on them and selecting Rename. Now select all imported lumps at once, right-click on them, and select Gfx → Convert to... The conversion window will pop up. Select "Doom Gfx (Paletted)" as the format to convert to and make sure SRB2's palette (which should be "Existing/Global" if you have set up srb2.pk3 as your Base Resource, otherwise use "Sonic Robo Blast 2") is selected. Press Convert to convert the images. If you are using a WAD file, you should now add the TX_END marker just like the TX_START marker above to close off the texture section. Now you can use the textures in your map.
Skies
Skies are created just like any other texture. However, to use them as a sky, name the texture SKYx, with x being the integer number you want. You can then use the sky for your levels by referencing the sky number in the level headers, using the SkyNum parameter.
Composite textures
If you want to import additional patches for your composite textures that cannot be used as stand-alone textures, import them just like the single-image textures above. For easy navigability, it is recommended that you put them in the Patches/ folder (for PK3s) or between P_START and P_END marker lumps (for WADs).
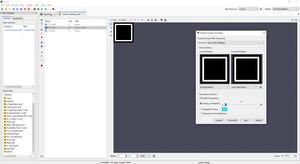
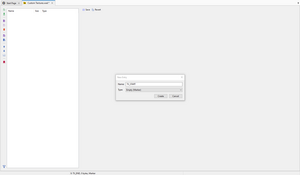
To create new composite textures, open SLADE's texture editor by clicking Archive → Texture Editor in the menu bar. If no TEXTURES lump already exists in your WAD or PK3 file, SLADE will ask you if it should create one for you. Click yes and select "ZDoom (TEXTURES)" and "Create New (Empty)" in the window that now opens. Now a new lump called TEXTURES should appear. Double-click that lump to open the texture editor. The texture editor provides a simple interface for creating composite textures out of your patches. To the left is a list of all composite textures. If you click on a texture, it will be displayed in the center of the window.
For the purposes of this tutorial, we will create a texture out of patches that are already included with SRB2. To create a new texture, click the "New" button below the list of textures and enter MARIOVIN as the name. Now an empty 64×128 texture frame will appear in the center of the window. At the bottom of the screen is a panel where you can edit various properties of the texture. Most of these have no effect in SRB2, but you can set the name and the size of the texture here. Increase the size to 128×128. Also, you must always set the type to "WallTexture" for SRB2 to recognize the texture.
To the right of the screen is a list of patches that are included in the texture. Right now the field is empty. Click the "Add new patch to texture" button to open the graphics browser. Note that the patches are separated from the stand-alone textures here. Go into the textures selection and search for MARIOW1 (there is a search box in the top right corner). Select this texture to add it to your composite texture. You will see that the previously empty texture frame is now filled up by the selected texture.
Now we will add vines on top of the texture. Open the graphics browser again and go into the patch selection. Search for VINE2 and add it to the texture. You will see that it is laid on top of the MARIOW1 patch, but since it is only 64×64 pixels big, it only fills up the top-left quarter of it. To fill up the rest of the texture, you must create three duplicates of the VINE2 patch by clicking the "Duplicate selected patch(es)" button next to the patch list.
Now, click on the first duplicate and look at the panel below the patch list. Again, most of the properties you can set here have no effect, but you can change the position of the patch on the texture here. Change the X position of the first duplicate to 64 and its Y position to 0. You can also position the patch by dragging it around in the preview. Move the other two duplicates to positions (0,64) and (64,64), respectively. Now the entire texture is covered with vines. Click "Save" above the texture list to save your new composite texture.
Animated textures
Animated textures are textures that cycle through several images at a specified interval to create an animation effect. They are defined in a special text lump called ANIMDEFS. Every line of text in this lump defines one animated texture and has the following format:
Texture [Texture name] Range [Texture name] Tics [Integer]
Texture [Texture name]: Determines the texture at which the animation loop starts.Range [Texture name]: Determines the texture at which the animation loop ends. All textures that are between those two alphabetically will also be included in the loop, e.g. if the first texture isSAMPLE1and the last isSAMPLE4, then SRB2 will cycle through the texturesSAMPLE1,SAMPLE2,SAMPLE3, andSAMPLE4for that animated texture. It is generally a good idea to number textures that are part of an animation loop consecutively like this, to make sure the right images are included in the loop.Tics [Integer]: Determines how long each individual texture will be displayed before changing to the next, in tics.
ANIMDEFS lumps that were automatically converted from the ANIMATED format (which SRB2 used before v2.1) with SLADE will have the keyword Optional between Texture and the name of the first texture. This keyword has no effect in SRB2 and can be omitted.
Example
Texture GFALL1 Range GFALL4 Tics 2
This line defines an animated texture that cycles from GFALL1 to GFALL4, changing images every two tics.