Level select picture tutorial
Level select pictures are the small thumbnails that are displayed for each level in the level select. While these are not required for custom levels, using them helps players distinguish levels from each other. To create a level select picture, you must take a screenshot of the map in SRB2, resize it to 160×100 pixels and put it into the WAD or PK3 file that contains the level. This tutorial explains the process.
Required tools
- A lump editor. SLADE is recommended for this, but this tutorial will also cover XWE where necessary.
- An image editor like PaintNET, PhotoFiltre, Microsoft Paint or GIMP.
Taking the screenshot
To take the screenshot, start SRB2 with your map loaded and navigate to the place where you want your screenshot to be taken. This should be a distinctive and easily recognizable part of the map. You can use the console command notarget to allow you to walk through the level without triggering enemies. Sometimes the best place to take a screenshot is from an aerial view that is hard to reach as a player. To work around this, you can activate Object placement mode with the console command objectplace, allowing you to float freely around the level while also keeping the enemies frozen. Alternatively, you can start an offline multiplayer game with your map in a gametype that uses spectators. If your map doesn't support such gametypes, you can use the -force parameter of the map console command to force the game to warp to it anyway. As a spectator, you can also float freely without triggering enemies.
Before you take the screenshot, you should hide everything from view that shouldn't be visible in the picture: The HUD can be hidden by pressing F3 or using the console variable showhud off. To hide the player character, change into first-person view by pressing the "Toggle Chasecam" button or typing chasecam off into the console. To hide the crosshair that appears in first-person view, type crosshair off into the console. Alternatively, all three settings can also be configured in the "Setup Controls" and "Game Options" menus.
Once you have everything set up, press F8 to take the screenshot. Take more than one so you can choose the best. Screenshots are saved in the PNG format and stored in the SRB2 folder or in the folder defined by the screenshot_folder variable.
Resizing the image
Now open the screenshot in your image editor and resize the image to 160×100 pixels. Level select pictures must always fit the SRB2 palette. Since the screenshot was taken straight from SRB2, the image is already in the correct palette. Save the image and rename it to MAPxxP, where xx is the two-digit map number; for map numbers above 99, extended map numbers must be used. For instance, the picture for MAP01 would be MAP01P.
Inserting the image

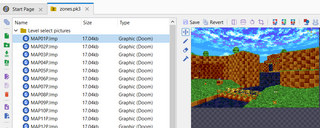
In your lump editor, open up the WAD or PK3 file containing your level. In SLADE, select "Archive → Import Files" in the menu bar, browse to the folder where the image is located and import it. The picture is now included in the list of entries on the left panel of the lump editor. Now right-click on the lump and select "Gfx → Convert to...". Select "Doom Graphic Format" as the format to convert to and "Existing/Global" as the palette (if you don't have srb2.pk3 as the main resource, either make it the main resource or select "Sonic Robo Blast 2" as the palette) and click "Convert". In XWE, select "Entry → Load" in the menu bar, browse to the folder where the image is located and import it.
| The picture must never be placed between the lumps of your map or the game will crash when trying to load the map. Instead, place all level select pictures together before or after the map lumps, or in a different folder if you are using a PK3 file. You can use Ctrl+U and Ctrl+D to move the pictures up or down on the list. |
After converting the image and selecting it, the lump editor may have applied offsets to it. However, level select pictures should not have any; they should be positioned in the upper left corner of the image view. To remove offsets, simply type 0 and 0 into the offset fields. Now save the changes to the lump and the file, close the lump editor and test your map.