Mystic Realm/Levels/Aerial Garden Zone Act 3
| Single Player levels | ||
|---|---|---|
| MAPAL: Aerial Garden Zone Act 3 | ||

| ||
| Emerald stages | ||
| Extra levels | ||
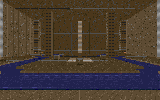
MAPAL, Aerial Garden Zone Act 3, abbreviated as AGZ3, is the third act of Aerial Garden Zone, the seventh zone in Mystic Realm. Unlike the other zones' third acts, it is not a boss fight, but rather a collection of four platforming challenges similar to those seen in the second act.
Walkthrough
You begin the level in a small room with a powered-down elevator and four teleporters. These lead to four different rooms, each containing a challenge, a button and a teleport back. Pressing a button in one of the rooms will make a torch light up in the main room to signify that it was pressed. Once all four buttons are pressed, the elevator will be activated. If you die, the switches you already pressed stay activated.
Starting from the teleport behind the spawn point and continuing in counterclockwise fashion, the rooms and their challenges are as follows:
- Enemy room: You will be attacked by a swarm of Jetty-syn Bombers and Jetty-syn Gunners while having to climb up a series of platforms over a death pit. Make sure to bring rings into this room, as it is the only one with enemies. Before you start climbing up the platforms, you should first kill all the Jetty-syns. Afterwards, climb across the platforms and be careful not to be knocked off by the Crawlas. You will reach the teleporter, but before you take it, jump across to the platform with the button and press it. It's possible, albeit difficult, to jump or spindash-jump back to the teleporter from the platform with the switch if you start from the slightly elevated edge of the platform. Should you fail, simply climb back up again to reach the teleporter.
- Blue spring room: In this room you have to bounce across several platforms with blue and yellow springs to reach the button. This is a fairly simple task in principle, but it requires very good mid-air control and leaves little room for mistakes. After pressing the button, turn around and use the springs to reach the platform with teleporter.
- Horizontal beam room: This room is similar to the second room on the left path of AGZ2's second path split. Jump across the narrow beams carefully to reach the button. There are no enemies to worry about this time, so take your time.
- Moving platform room: This room is similar to the second room on the right path of AGZ2's second path split. Jump across a series of vertically moving platforms to reach the button. Carefully observe which heights each platform moves between to plan a path across the room. There are no enemies in this room either, so take your time.
Once all the buttons are pressed, the elevator is activated. Jump onto the central platform to be carried upwards to the exit.
Note that in v4.5 and upwards, you can get a perfect bonus if you collect all 40 rings.
Gold emblem ( 宝 )
This emblem is located in a hidden passageway surrounding the room with the elevator. From the spawn point, jump into the water to the left of the platform you are standing on. Face towards the wall to find a small hole you can spindash through. You will enter a passageway surrounding the room that contains an extra life, a Super Sneakers Monitor, a Whirlwind Shield and the Gold emblem.
Technical data
| |||||||||||||||||
| ||||||||||||||||||||
| Things | |
|---|---|
| Player starts | Occurrences |
| Player 1 Start | 1 |
| Enemies | Occurrences |
| Crawla (Red) | 11 |
| Jetty-Syn Bomber | 9 |
| Jetty-Syn Gunner | 6 |
| Rings and weapon panels | Occurrences |
| Ring | 40 |
| Total rings | 40 |
| Monitors | Occurrences |
| Whirlwind Shield Monitor | 1 |
| Super Sneakers Monitor | 1 |
| Extra Life Monitor | 1 |
| Hazards | Occurrences |
| Torch | 4 |
| Pushables | Occurrences |
| Gargoyle | 1 |
| Springs and fans | Occurrences |
| Yellow Spring | 7 |
| Blue Spring | 75 |
| Miscellaneous invisible | Occurrences |
| Teleport Destination | 8 |