Source code compiling/CMake
This is a guide for compiling the source code using CMake. CMake is a meta build system for C and C++ projects that generates project files for the target system, allowing a single set of well engineered build scripts to replace individual project files and Makefiles for each supported platform of a project. This streamlines the compiling process across different platforms. SRB2's CMake support also includes an automatic packaging system. This guide will assume that you have already cloned the public repository from GitHub or GitLab.
Initial Setup

First of all, you will need the following installed on your system:
- CMake - The main compiler; On Windows, you can install it through one of the up-to-date
.msifiles on their website, on Mac, you can install it using one of the up-to-date.dmgfiles on their website or by using Homebrew, and on Linux, you can install it through your package manager, or just compile it from source on either platform. For beginners, it's also recommended that you use the CMake GUI as well, for a quicker and easier compiling experience. - An IDE, or Developer Environment - For Windows and Mac, you have a lot of options, such as the recommended Visual Studio Community Edition, while on other platforms, such as Linux, Visual Studio Code is typically recommended.
- SDL and SDL2_mixer - On Windows, Mac, and Linux, you can get SDL2 here and SDL2_mixer here, or just compile them from source. On Linux, alternatively, you can also download the packages from your package manager as well.
The following components are also recommended, but not required, for compiling:
- SDL_Mixer_X - Advanced sound and MIDI option and playback
- libpng and zlib- PNG screenshots under OpenGL and minor image rendering
Configuring and Generating

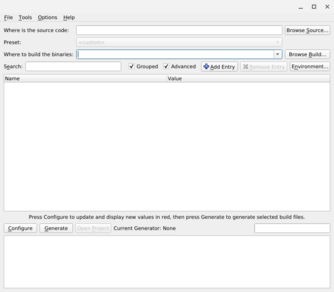
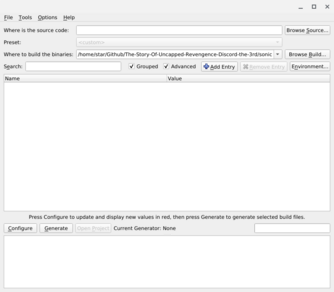
Once everything's in order, open CMake, or it's GUI, and set "Where is the source code:" to where you extracted SRB2's source code directory. Then, set the "Where to build the binaries" box to a new folder, named whatever you want, which CMake will use to store the files that it needs in order to compile SRB2.
| Note If you've made a mistake, just click the file tab at the top of the window and press "Delete Cache", or just delete the new folder you've created. |
Now, click "Configure" and choose the generator you want to use to compile SRB2. For a regular, plain install, on Windows, this would be the MSYS Makefiles generator, on Mac, this would be the Makefiles generator, and on Linux, this would be the Unix Makefiles generator, or even the Ninja generator. There are lots of other generators to work with depending on your platform, but for compiling a plain, vanilla build of SRB2, any one of these generators will serve you well.
After initially configuring SRB2 using CMake, you might want to browse the other flags and set them as you prefer. Grouping the flags, by setting the "Grouped" setting near the search bar may help you with this.
Some flags you may want to set include:
CMAKE_INSTALL_PREFIX- If you're planning on installing SRB2 to a specific directory afterwards, this flag will install SRB2 to the directory listed in this flag, so configure this as much as you wish.
SRB2_USE_CCACHE- This is useful when compiling SRB2 multiple times, as it speeds up the compiling process after the initial compile. You must have theccachepackage installed.
SRB2_CONFIG_HAVE_MIXERX- Allows for advanced sound and MIDI options and playback. You must have theSDL_Mixer_Xpackage installed.
Some optional flags include:
SRB2_ASSET_INSTALL- This forces SRB2 to compile using the assets it finds in a specific directory, specified by theSRB2_ASSET_DIRECTORYflag. These assets mainlysrb2.pk3,player.dta,zones.dta, andpatch.dta, withmusic.dtabeing optional, but not required.
Once you've configured your SRB2 build successfully, hit the "Generate" button to create the project files.
Building and Compiling
From here, it depends on which generator you chose.
Under the Microsoft Visual Studio generator, simply right-click the SRB2 project and click Build. You can change between Debug and Release using the toolbars at the top.
Under any of the Makefile generators,navigate to the folder where the project files are located in your preferred terminal and type make -j$(%NUMBER_OF_PROCESSORS%) on Windows, or make -j$(nproc) on Mac and Linux.
Under Xcode, open the generated SRB2.xcodeproj file, click the "Scheme" dropdown in the "Type" bar, select "SRB2", and then hit Command+B to compile. This generator should usually compile SRB2 quickly faster than other systems and generators.
Alternatively, you can also run cmake --build <insert project file directory here> to build SRB2 as well.
| If you plan on changing any flags after SRB2 has finished compiling, you'll have to delete CMake's cache and compile SRB2 again. |
Installing
To install SRB2 to a specific directory on your system, use the command cmake --install <insert project file directory here>.
Depending on what you've set the CMAKE_INSTALL_PREFIX flag to, CMake will install SRB2 to that directory.
On Windows, this will install SRB2 as a .exe file, with the binary, assets, and DLLs within the directory, on Mac, this will put the assets and binaries into an Application Bundle, that can install and run SRB2 by simply by dragging the icon into your Applications, and on Linux, this will install SRB2 as file as a console script, with the assets being in the same directory.
