User:PencilVoid/Custom Palette Tutorial
This tutorial covers how to make your own custom Palette for SRB2. While you could just use the ingame colour mixer, creating your own palette by hand allows for more advanced and precise editing.
How to find the palette data
SRB2's palette can be found by opening srb2.pk3 with SLADE and looking for a lump named PLAYPAL (it shouldn't be hard to find). This is the palette SRB2 uses for graphics, rendering, and the flash palettes (Armageddon Blast, Recycler Monitor, etc.) Familiarise yourself with the order the flash palettes are in and the colour they have.
How to edit the palette
There are multiple ways to go about this. SLADE lets you edit each index directly using your operating system's built in color editing dialogue, but this can be suboptimal. My preferred method is to export the palette as a PNG file and edit this in paint.NET. Make sure you don't change the placement of colours or dimensions of the image file containing the palette, as this can cause the importing process to fail or behave unexpectedly. To export the palette, simply click the "Export as" button, select PNG format, and navigate to a suitable folder.

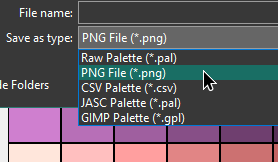
Then, simply edit each colour by using the fill tool and your image editor's colour picker or applying a filter to the entire palette. A quick way to edit colour ramps is to use the gradient tool to generate a fade by setting the first and last colours, although this method is unsuitable if you want more precise control over each shade. In this case, a gradient mapping tool may be desired.
How to put your edited palette into SRB2
To use this in SRB2, you'll want to create a brand new PK3 as shown below.
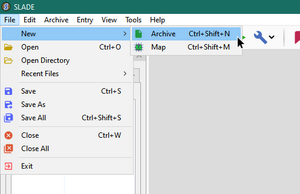
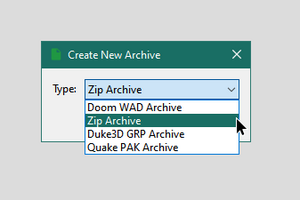
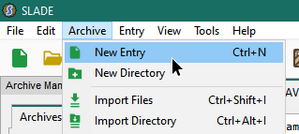
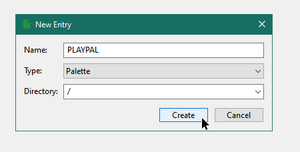
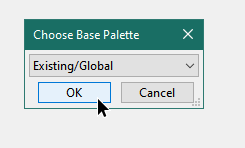
Then create a new lump and select "Palette" as the type. It must be named PLAYPAL; naming it anything else will not cause the game to print warnings or errors upon loading, but the it will not replace the default palette and instead will do nothing. Any palette can be chosen as the base palette, but "Existing/Global" is selected by default.
Then hit "Import from", which is right next to "Export as". Select PNG format and navigate to your edited PNG file.
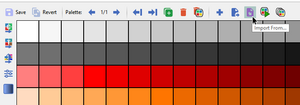

The process is nearly complete. All that's left is to create the flash palettes. Do this by hitting the duplicate button so there are two palettes in the palette lump. Repeat this until there are 14 of them in total.

The five palettes after your first one will be the flash palettes, with different filters. The first one will be tinted white, the next one tinted white and blue, third white and green, fourth red, and fifth should be the original palette with inverted colours. You can apply the necessary effect either in your image editor or in SLADE. The palettes after these ones can be left alone, as they're unused. However, if you want, you can create special variations for use in your own projects. Once you've created these flash palettes, your custom palette is complete and ready for use/release. Save your palette as a PK3 and then load it ingame. If set up correctly, the game will render visuals your custom palette.
Note that the two renderers available utilise the palette differently. The Software renderer is entirely limited to the 256 colours in the palette, and can never use any other colour. Therefore, shading and transparency are influenced by the colours in the palette. In contrast, OpenGL uses the palette only for reading sprites and texture files, and renders the game in truecolour. Also, OpenGL ignores the defined flash palettes and calculates the modified colours at runtime. Your palette will appear differently between the two renderers, which should be kept in mind.
You may have noticed the COLORMAP and TRANSxx lumps while looking for PLAYPAL in srb2.pk3. These are what the Software renderer uses for shading and translucency blending, respectively. These are different from regular graphics files in that their data encodes for indices of the palette rather than RGB colour data. As such, they are made for the default palette and your custom palette may cause translucency and shading to look strange. These can also be edited, but the process of editing these is more complicated and won't be covered here until I gather the energy to document it.
