User:PencilVoid/Ring Racers/Your First Map
An updated version of this tutorial can be found at the [Ring Racers Wiki].
Initial setup
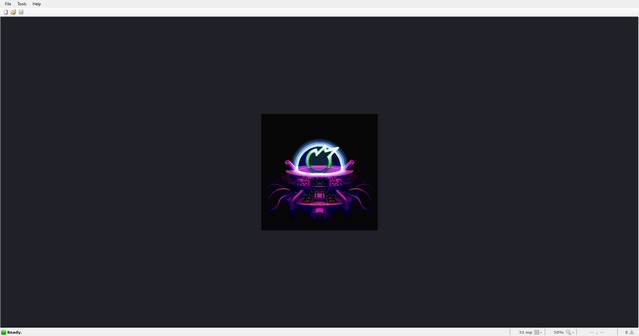
The first thing you'll see when you boot HVR (High Voltage Ring) for the first time is this screen:
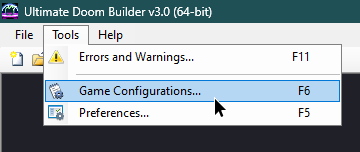
Firstly, you need to set up your configuration for Ring Racers. To open the configuration screen, select "Tools" in the ribbon at the top and then select "Game Configurations...". You can also press F6 on the keyboard to access this menu instantly.
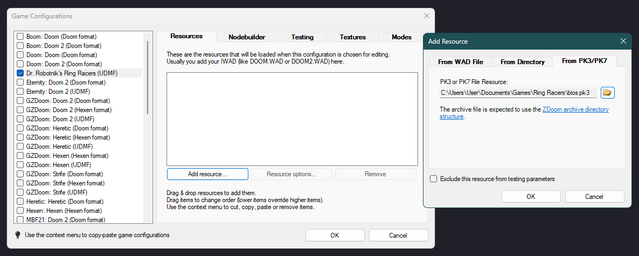
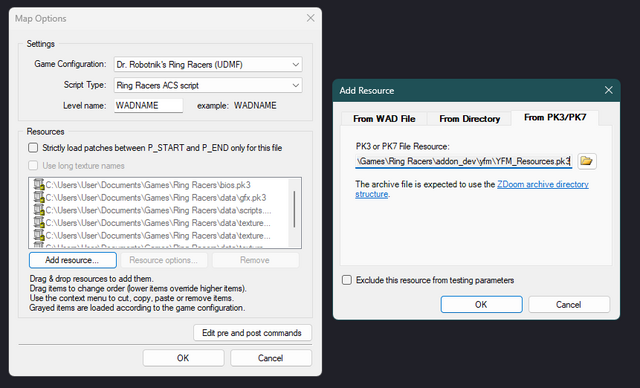
Scroll to "Doctor Robotnik's Ring Racers (UDMF)" in the list on the left and enable the checkmark to the left of it if it isn't on already. Then, select "Add resource...", then in the pop-up that opens select "From PK3/PK7" and click the folder icon. Navigate to your Ring Racers installation, and select the necessary files.
The files you should add here are:
- bios.pk3
- data/gfx.pk3
- data/scripts.pk3
- data/textures_General.pk3
- data/textures_OriginalZones.pk3
- data/textures_SEGAZones.pk3
For all of these, don't forget to turn on "Exclude this resource from testing parameters" before clicking OK. This prevents them from being loaded twice, as the game will automatically load them when you test your map.
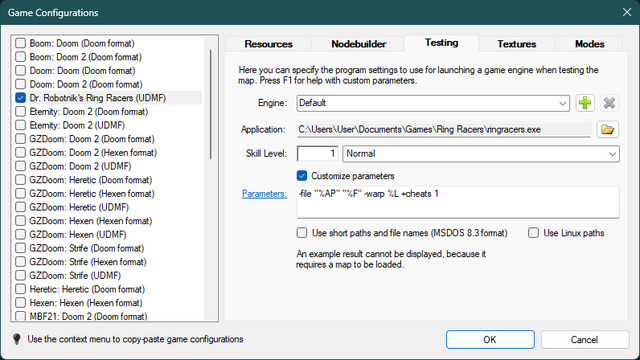
After this, head over to the "Testing" tab. Here, you will create a profile to test your map with. Click the green plus icon, and navigate to your Ring Racers installation. Select ringracers.exe. Once this is done, you can configure your testing profile to suit your needs. It is recommended to set the skill level to 1, which corresponds to Intense difficulty. Ring Racers maps are balanced around Gear 2, but you will need to make accomodations for gears 1 and 3.
Turning on "Customize parameters" allows you to change the context the game launches with. For instance, adding +cheats 1 will give you access to various console commands that are useful for mod developers. Keep in mind that it will also disable save data for that session, so if you back out of your map and play the game as normal your progress won't be saved until you re-launch the game normally.
Creating a map
To start a new map, click the "New map" option at the top, or hit Ctrl+N on your keyboard.
This will bring up a screen where you can see the game configuration and the resources the map will use. However, you will need to add an additional resource PK3 containing your map's level header.
Level header and resources
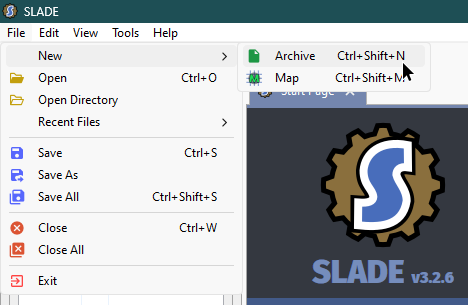
To create a custom resource PK3 for your map, you will need SLADE. Click "File" -> "New", then select "Archive". You can leave the archive type as "Zip Archive". Select "Create".
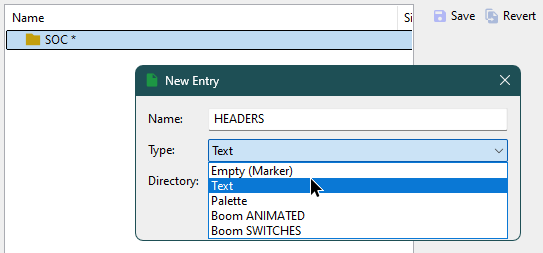
Right click on the empty panel to the left, then select "New" -> "Directory". Name this new folder "SOC", then press "Create". SImilarly, right click on the new folder that appears and select "New" -> "Entry". Configure it as a text lump, and name it "HEADERS".
The lump used here can be named arbitrarily, but it is recommended to name it something that indicates what it is used for. This lump will contain your level headers.
A level header contains information about a level that is necessary for it to function, such as its name, what game type it's meant for, and cosmetic features such as weather or lighting.
Here is an example level header:
Level YFM_Test
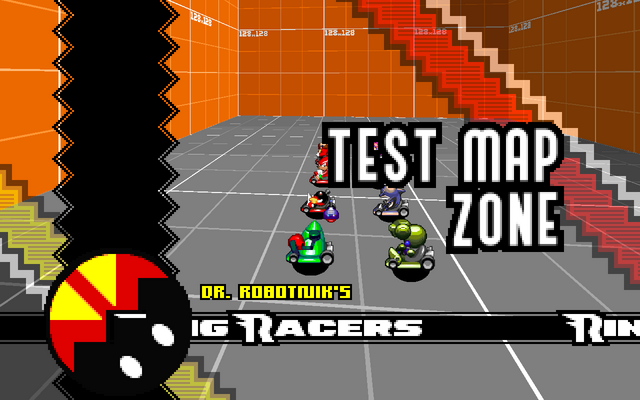
LevelName = Test Map
TypeOfLevel = Race
SkyTexture = SKYEC
NumLaps = 3
Music = GRHIZ
MobjScale = FRACUNIT/4
This is a simple level header that provides information such as the game type the level is for (TypeOfLevel), how many laps it has (NumLaps), its music (Music), and the texture to use for the sky (SkyTexture). MobjScale dictates the scale of every entity in the map. Many maps set this to a number lower than 100% as it provides a performance advantage. Here, FRACUNIT/4 corresponds to 25% scale.
The first paramater is unique as it determines your level's ID. It is common practice to give the ID a prefix that is unique to your mod. For example, Ring Racers uses RR. It is common to use an initialisation of the mod's name; for example a mod named "Very Cool Level Pack" may use an ID such as VCLP_LevelName.
Once you are done writing your level header, save it as a PK3 file. Give it a name that clearly identifies it as a resource PK3.
After this, close SLADE and go back to HVR. Click "Add resource" and add new resource PK3 similarly to how you added the base resources. However, this time do not select "Exclude this resource from testing parameters". This is so that the game knows to load your resource PK3 when testing.
Once this is done, it will show in the resources list. Click OK to begin editing your map.
Drawing map geometry
The bare minimum needed for a map to load is two sectors. You can select "Draw Rectangle Mode" by pressing the orange rectangle icon at the left of the screen, or press Ctrl+Shift+D. Left click on the grid to place the upper left corner, and left click somewhere else to place the lower right corner. Then select "Draw Lines Mode" by clicking the orange and blue line icon or pressing Ctrl+D, and use it to bisect the rectangle by clicking once on one edge and clicking again on the opposite edge.
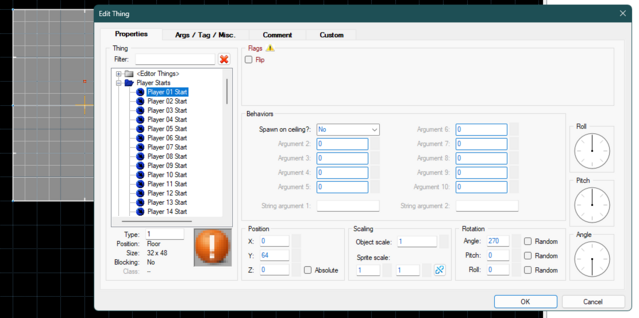
You will need to place player spawnpoints, so the game knows where to position each player at the start of a map. Press the blue circle with a black arrow in it, or press T. Right click in the rectangle you just drew to place a thing and bring up its editor window.
At the left, you can change the thing type. It is already on "Player 01 Start", so we don't need to change this. Towards the right, we can change other information such as its angle. Rotate the "Angle" dial at the bottom left so it is pointing to the right.
In a Race map, you need to place 16 spawn points as that is the highest numbers of players that can be in a race at a time. Repeat the process until there are 16 spawn points, changing the thing type appropriately by selecting it on the left.
Once this is done, test your map by pressing the green arrow at the top of the screen or pressing F9 on your keyboard.
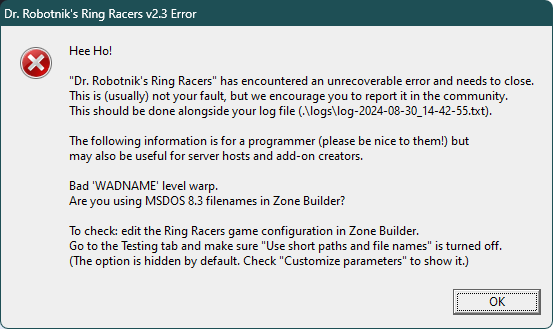
The game will boot and immediately crash.
This is due to the level file being named improperly. You must save it and give it a proper name. Specifically, this name should be the same as the ID you chose in the level header earlier. Save it in an appropriate location (e.g. the same folder as the resource PK3) and try again. Your level should now load properly.

