Zone Builder tutorial/Special effects and tagging
Now that you know everything about basic sector editing, we will take a look at more complicated material: floating platforms, water, and other special effects. You will learn how to apply special effects to linedefs and sectors, and how to manipulate in-level sectors through the use of control sectors and tagging.
Sector specials
The easiest type of special effect is the one that can be directly applied to sectors. As you might remember from the second chapter, each sector has a "Special" box in its properties window. Here you can specify one or more effects that the sector should have. Most of them need other additional settings to work, but some work on their own. To try it out, draw a new sector and give it a PIT floor texture, as well as an effect number of 7. As you can see, the drop-down box now reads "Death Pit (No Camera Tilt)". If you test the level and touch the floor of this sector, you will die. Another prominent example of a sector effect is the "Exit/Special Stage Pit/Return Flag" effect, which has the number 8192. This special is responsible for ending the level in Single Player mode when it is touched. In Special Stages, it will cause an instant time over upon touching, and in CTF, it will return flags that touch the floor to their base.
Sector specials can also be combined. To do this, click on the button to the right of the drop-down box and switch to the "Generalized Effects" tab. In SRB2, sector effects are divided into four different categories, and you can choose up to one effect from each category, allowing you to combine different effects. For example, choose the "Death Pit (No Camera Tilt)" special from the first category and the "Exit/Special Stage Pit/Return Flag" special from the fourth category. In CTF, this combined effect will cause the flag to be returned to the base if a flag carrier dies in the sector. If you close the effect window, you will see that the "Special" box now displays a value of 8199, which is the sum of the two individual effects.
- Visual Steps
-
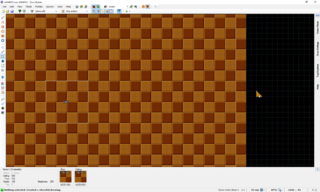
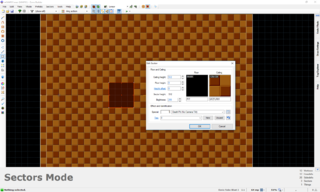 Creating a pit and giving it sector type 7.
 -
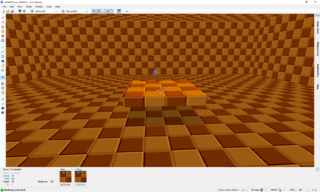
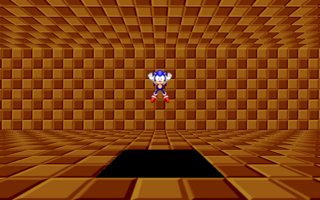 The resulting death pit in-game.
 -
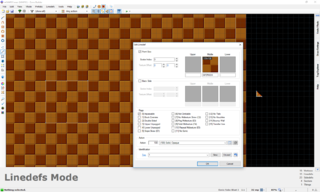
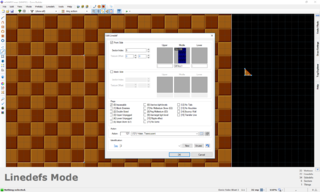
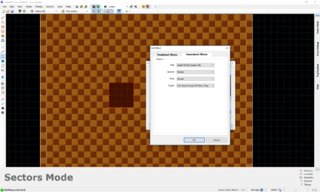 Adding the "Exit/Special Stage Pit/Return Flag" effect in the Generalized Effects tab.
 -
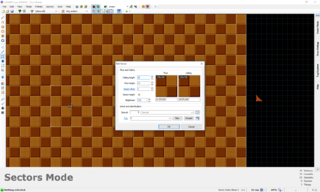
 Now the sector has sector type 8199.


Linedef specials
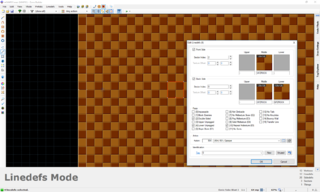
Just like sectors, linedefs can have effects applied to them. Most of them are used for more complicated settings that will be explained later on, but some can be applied to the linedefs themselves to produce an effect on them. For example, select all the inner linedefs of the thok barrier and type "500" into the "Action" field in the properties window. If you look at the drop-down box, you will see that we selected the "Scroll Front Wall Left" effect. If you click on the button to the right of the drop-down box, another window will open that lists all available linedef effects and their groups. The linedefs have now turned green to signify that they have an effect, and if you test the stage, the outer walls will continually scroll to the left. (If you have constructed the thok barrier in such a way that the linedefs face outward, you cannot see the effect, since only the front sidedefs scroll. In this case, flip them with the "Flip Linedefs" tool.)
Another example of such a linedef effect are translucent walls. These effects, whose numbers are in the 900s, make the middle textures of a linedef translucent to a certain degree. If you still have the sector with the middle textures from Chapter 3 (if not, recreate it), give its linedefs effect 904. This will make the middle textures 50% translucent. Lower and upper textures, however, are not affected and stay as they are. If you test the stage now, you will be able to see through the formerly opaque middle texture walls.
- Visual Steps
-
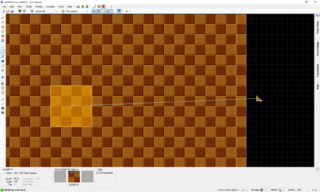
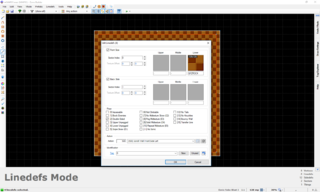 Giving the outer walls of the level the "Scroll Front Wall Left" effect.
 -
 The scrolling walls in-game.
 -
 Giving a sector with middle textures a translucent wall effect.
 -
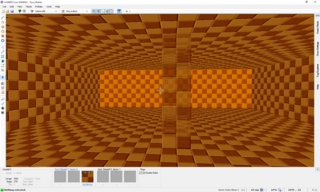 The resulting translucent middle textures in Visual Mode.


Tagging and control sectors
Floating platform

Most linedef specials don't work like the examples above, since most of them modify the behavior of sectors and not of linedefs. Therefore, the effects are not applied to in-level linedefs, but to linedefs in separate sectors created outside of the main map. Those sectors are called control sectors. They are then linked to the sectors that should have the effect via the tag that we discovered earlier. As an example of this method, we will create an FOF. FOF stands for Floor Over Floor and is the name for floating platforms in SRB2. Since a normal sector only has one floor and ceiling, a floating platform would normally not be possible. We can change this with the use of control sectors.
Start off by creating a new square sector in the main map. This defines the shape of our floating platform. Right-click on the sector and click on the New button next to the "Tag" field. Since we haven't used a tag yet, a "1" will appear in the box. This sector now has a tag of 1. This means that any linedef with a tag of 1 will apply its special effect to this sector. The special effect is determined by the linedef type, and such a linedef is called a control linedef. The sector that the effect is applied to is called a target sector. You can have several different control linedefs that have the same tag, but then they will all affect the same sector. You can also have several target sectors with the same tag, in which case the same special effects will be applied to all of them. If you give a control linedef a tag of 65535, its special effects are applied to all sectors without exception, which is sometimes useful for visual effects.
The next step is to create a new sector outside the main map, or in other words, beyond the thok barrier. The size and shape of this sector doesn't matter (at least not for the FOF effect), but most mappers prefer a square with sides that are 32 fracunits long, or a triangle that is basically the square cut in half on the diagonal. One of the linedefs of that sector will now serve as the control linedef, but it is up to you to decide which one. Right-click on that linedef and give it a tag of 1. Now give it an effect of 100. This creates a typical FOF: It is solid on all sides and flats, completely opaque, and it can cast a shadow. If you hover over the linedef with your mouse, an arrow will appear that points from the control linedef to the target sector. The arrow will also appear if you highlight the target sector in Sectors Mode. This way, you can easily identify tagged linedefs and sectors in your map.
Now we need to define the appearance of the FOF. Firstly, you must set the textures shown on its sides. FOFs are programmed in a way that doesn't allow different textures on its sides; instead, the same texture will be shown on all of them. This can be changed by setting the Transfer Line flag, but that process is rather complicated and will not be explained here. The texture shown on the sides is the middle front texture of the control linedef (control linedefs normally don't have a back side anyway). In the Edit Linedef window, enter a texture of your choice (we'll use GFZROCK for this tutorial).
The other properties are set in the Edit Sector window for the control sector. The control sector's ceiling is the top side of the FOF, while the floor is the bottom side. Thus, the floor and ceiling height determine where the FOF will be positioned. Choose heights of 64 and 96, so that the player can jump of top of it. For the flats, choose GFZFLR01 to go along with the sides. You can also lower the brightness of the sector to 192, which will make the FOF cast a shadow.
- Visual Steps
-
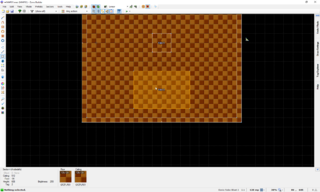
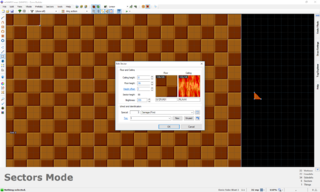
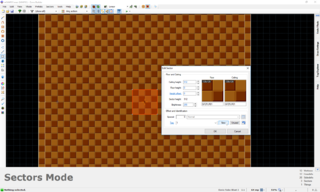 Creating a target sector and giving it tag 1.
 -
 Creating a control sector.
 -
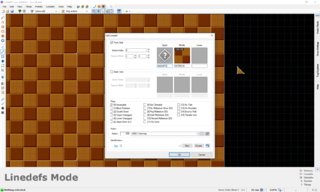
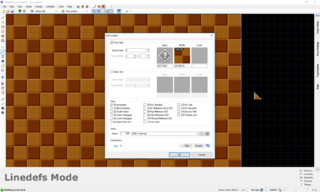
 Setting up the control linedef and tagging it to the target sector with tag 1.
 -
 The arrow connects the control linedef the and target sector when hovering over either.
 -
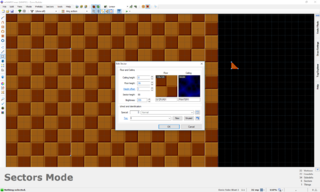
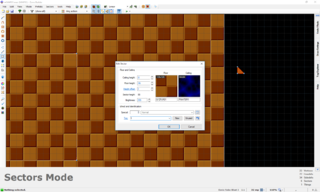
 Setting up the control sector.
 -
 The resulting FOF in Visual Mode.


Water
Water, just like floating blocks, is made with FOFs. The difference lies in the linedef type that is used for it. There are several different choices for water, depending on what effect you want, but for this tutorial, we will use linedef type 121. This is a water block with translucent surfaces in which all sides and flats are rendered. Water blocks can theoretically float anywhere in the air, but to create a realistic effect, you should create a pit and then "fill it up" with water. Make the pit reasonably large so that the player can comfortably stand inside it and look around. Give the pit sector a new tag (it should be 2 if you followed this tutorial).
Create another control sector like you did before. You must now specify some properties to create the water block you want, of course. The control linedef should have type 121 and be tagged to the water pit. The floor height should be the same as the floor height of the pit. The ceiling height should be 8–16 fracunits below the surface of the pit. Water doesn't normally fill up a pool to the brim, so you should leave a bit of space. For the ceiling flat, choose a water surface, such as FWATER01. For the floor flat however, use the same flat as the bottom of the pit. Otherwise, the bottom will look as if it has a water surface on it, which looks weird. Since the sides of the water block will be obscured by the sides of the actual pit, you theoretically don't need a texture on the control linedef. If you want one, use GFALL1 to match the surface.
Now you should have a working water block. However, if you step into it, you will see that it doesn't have a blue hue to it like the water in the official SRB2 levels. This color is applied with a linedef effect called Colormap. We will now apply a blue colormap to our water pool. You can either make a new control sector for the colormap or use a linedef on the same sector that creates the water block. Give that linedef type 606 and a new tag (which is probably 3). Since we want to apply the effect to our water block, which is represented by its control sector, we must tag the effect to the control sector. Therefore, give the control sector for the water block the same tag. Now enter #40A0FFJ into the front upper texture field of the new control linedef. This is a not an actual texture, but rather a color code that stands for the mild blue tint used for water in SRB2. Now your water should be blue.
- Visual Steps
-
 Creating a pit for the water and giving it tag 2.
 -
 Setting up the control linedef.
 -
 Setting up the control sector.
 -
 The resulting water block in-game, without a colormap.
 -
 Setting up the colormap control linedef and giving it tag 3.
 -
 Giving the FOF control sector tag 3.
 -
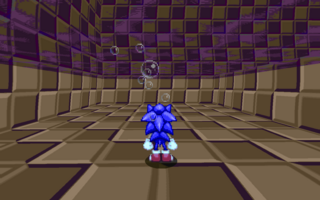 The resulting colormap in-game.


Damaging liquids
Liquids that damage the player, such as lava, are rather easily made. To transform our water pit into a lava pit, only a few changes need to be made. The shape stays the same, so the heights are unchanged. The surface flat should be changed to RLAVA1 and the side textures (if used) to RVZFALL1. The colormap code should be changed to #FF7F00Z. The most important change, however, and the one that makes the lava damage the player on contact, is to use the fire damage sector type on the FOF control sector. Simply give it an effect of 3 and it will act like damaging lava.
- Visual Steps
-
 Changing the water surface and giving the FOF control sector the fire damage sector type.
 -
 Changing the water FOF sides.
 -
 Changing the colormap.
 -
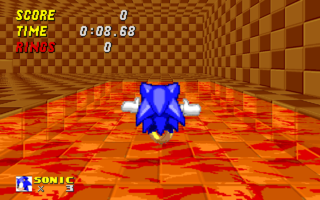 The resulting lava block in-game.


Control sector parameters

Depending on what effect you want to use, there are several properties of the control sector or the control linedef that will be used as parameters. Most of them are self-explanatory, such as linedef length or floor height. Other parameters include the direction the linedef (as a reminder, the notch always faces to the right of the linedef) and the texture offsets of both sidedefs. The flags of the control linedef are frequently used for optional features. The names of the flags that are displayed in the properties window are always adapted to indicate what they do for the current linedef type. For a more detailed explanation of their effects, refer to the articles for the specific linedef types.
A slightly more complicated concept is that of X and Y distance (or X and Y length) of a linedef. It is frequently used for more complicated effects to split the linedef length into two parameters. Basically, the X distance is the distance of the two vertices measured only on the X axis (left to right), while the Y distance is the distance of the two vertices measured only on the Y axis (up to down). You should never make a linedef diagonal when the normal length is required as a parameter, since the game might calculate the wrong value in that case. Linedef length and X/Y distances are never used as parameters at the same time.
Sometimes, several sector specials and linedef specials need to be combined to produce a more complex effect, especially when using linedef executors. These are special effects that can be triggered by the player while playing the level. For example, one could make a door open when standing on a button. In that case, you would need a sector effect on the button to trigger the effect, as well as a control linedef tagged to the button that executes the effect. Linedef executors are not explained here, however, but in a separate tutorial.