PolyObject tutorial
PolyObjects are a way to create level geometry that can move horizontally and rotate, unlike FOFs. Additionally, their translucency, visibility and tangibility can be modified through linedef executors. This tutorial shows the setup of a basic PolyObject, usage of their actions, as well as more complex settings.
Basic PolyObject
Introduction
A PolyObject is a group of linedefs, typically a sector, that is created outside of the main map and then inserted into the map via a spawn point. Two linedef specials are involved in creating a basic PolyObject: Linedef type 20 is given to one linedef of a PolyObject to make the game recognize it as such, while linedef type 22 can optionally be used to specify the parameters of the PolyObject. In UDMF maps polyobject parameters are instead handled by the flags of Linedef type 20.
Also required are two Things: the PolyObject Spawn Point and the PolyObject Anchor. These are used to specify where the PolyObject will appear.
The following terms are used to refer to the components of a PolyObject:
- PolyObject sector: The sector that forms the actual PolyObject. It is placed outside of the main map.
- First Line: One of the PolyObject's linedefs (it doesn't matter which one) has to be given linedef type 20. This linedef is called the First Line and it is used to identify the PolyObject.
- Surrounding sector: Around the PolyObject, an additional sector has to be created. This sector needs to have the same properties as the sector that will surround the PolyObject in the actual level, i.e., the same floor and ceiling height, same light level and same flats.
- Parameter sector: To change the default properties of the PolyObject, an additional control sector has to be created and one of its linedefs has to be given linedef type 22.
- PolyObject Anchor: This is a Thing that must be placed anywhere inside the PolyObject sector or the surrounding sector. This is sort of the focal point for the PolyObject, and all movements will be performed around this point.
- PolyObject Spawn Point: This is a Thing that defines where the PolyObject Anchor will appear inside the main map. Use a PolyObject Spawn Point (Crush) to make the PolyObject kill the player if they are caught between it and a wall, or if they touch it while it is moving fast enough.
- PolyObject ID: Each PolyObject has its own ID that is used in several places to identify it. Both Things have this as their Angle, and both linedef type 20 and 22 have this as their tag. Any special effects that are applied to the PolyObject are tagged to it with its ID.
Instructions
Depending on what you want to do with your PolyObject, the Anchor can be placed at different points. For rotating or horizontally moving PolyObjects, it's usually best to have the Anchor in the center of the PolyObject, while swinging PolyObjects mostly have them to the side. For more complex PolyObjects, the Anchor might not even be inside the PolyObject itself. To learn the basics of PolyObject creation, it's best to start with the most simple shape, which is a cube with its Anchor in the center.
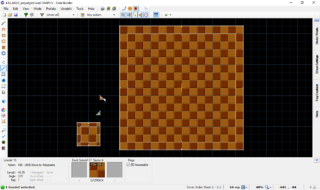
Start by placing the PolyObject Spawn Point where you want the PolyObject to appear in the map. The Angle of this Thing must be set to the PolyObject ID. You can choose the ID freely as long as no two PolyObjects use the same ID. For the purposes of the tutorial, we assume the ID is 1. Now create a sector outside of the main map that is big enough to contain your PolyObject sector. Since our test PolyObject is a cube, this sector should be a square that is bigger than the PolyObject. This is the surrounding sector, so it has to be given the same properties as the sector the Spawn Point is in. You can do this automatically by joining both sectors.
- Visual steps
-
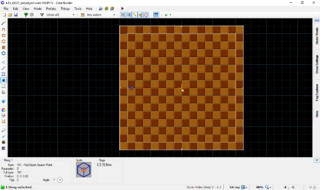 Placing a PolyObject Spawn Point.
 -
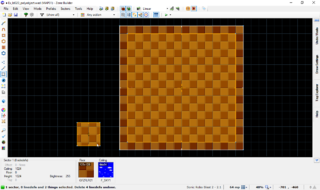 Joining the in-game surrounding sector with the exterior surrounding sector.


Inside this surrounding sector, create the PolyObject sector. In our case, it is a simple square. It is very important to make all linedefs face outward. The notches in the middle of the linedef should face the surrounding sector, not the PolyObject sector itself. If your linedefs face inward after creating the sector, you can flip them by selecting them and pressing F, or choosing Linedefs → Flip Linedefs in the menu bar. Now pick any linedef of this newly created sector and give it linedef type 20. This is the PolyObject's First Line. Set its tag to the PolyObject ID, which is 1 in this case. In the center of the PolyObject sector, place the PolyObject Anchor. The Angle should be the PolyObject ID, which is 1 in this case. The bottom and top height of the PolyObject are set in the PolyObject sector, simply as floor and ceiling height of the sector.
- Visual steps
-
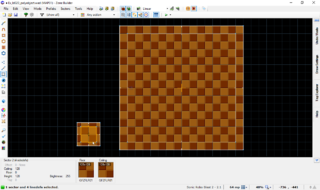 Creating the PolyObject sector, which defines the dimensions of the actual PolyObject.
 -
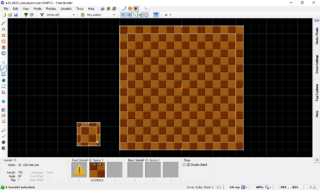 Giving one of the PolyObject's linedefs type 20.
 -
 Placing a PolyObject Anchor.


If you test the map now, it will load properly, but the PolyObject won't show up. If you try walking into the area where the PolyObject should be, you will notice that it will block you – the PolyObject is already there, but it currently doesn't have any textures set, making it invisible. The textures are set as the middle textures in the PolyObject sector, for every linedef separately – PolyObjects are regular sectors, not FOFs, so every linedef must have its own textures specified. The front middle texture is shown on the outside, while the back middle texture is shown on the inside. If you want your PolyObject to be solid, opaque and have flats, the insides will not be visible anyway, so you can leave out the back middle textures. In general, missing textures will not produce glitches of any sort; they will just stay invisible.
- Visual steps
-
 Giving all linedefs a front middle texture.
 -
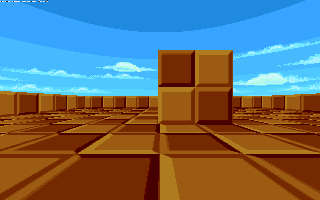
 The PolyObject in-game.


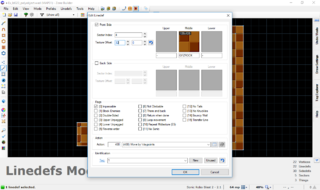
In its current state, the PolyObject will not display any flats. This is because flat rendering is disabled in the PolyObject's default settings. To change the default settings, you need to create a parameter sector. Create a new control sector and give on of its linedefs linedef type 22, PolyObject Parameters. Set its tag to the PolyObject ID, which is 1 in this case. To make the PolyObject render flats, check Flag [9] / Solid Midtexture / Effect 4 on the parameters linedef. The flats that the PolyObject will display are set by the floor and ceiling flat of the PolyObject sector.
- Visual steps
-
 Creating the parameter sector.
 -
 Giving one of its linedefs type 22.


Because the linedefs of the PolyObject are two-sided, their textures are only rendered once by default. For example, if your texture is 128 fracunits high (which is the case with many common textures like GFZROCK) but your PolyObject is 256 fracunits high, only the upper half will have visible textures. To fix this, you must give every linedef Flag [10] / Repeat Midtexture / Effect 5 so that the textures are tiled to fill the entire height of the PolyObject.
- Visual steps
-
![Checking Flag [10] / Repeat Midtexture / Effect 5.](/w/images/thumb/1/17/PolyObjectTutorial-Image10.png/320px-PolyObjectTutorial-Image10.png) Checking Flag [10] / Repeat Midtexture / Effect 5.
Checking Flag [10] / Repeat Midtexture / Effect 5.
![Checking Flag [10] / Repeat Midtexture / Effect 5.](/wiki/File:PolyObjectTutorial-Image10.png)
Minimizing visual glitches
Although the PolyObject in this tutorial is simple enough so that there shouldn't be any visual errors, you should bear in mind that PolyObjects are sometimes rendered incorrectly, with invisible sections and inner walls superimposed above outer walls. When trying to minimize visual glitches, changing around a few things about the setup of the PolyObject can help a great deal. One of the best strategies is to choose a different linedef as the PolyObject's First Line. This will usually just shift the rendering errors to another part of the PolyObject, rather than eliminating them entirely, but this can still be useful if only a few sides of the PolyObject are typically in view.
There are a few situations that are especially likely to produce rendering errors: moving between sectors, especially sectors with different floor and ceiling heights, colliding with other level geometry, and moving in front of, or behind, FOFs, other PolyObjects or sprites. You should try to avoid these situations as much as possible. In cases where they are unavoidable, take special care that they don't produce overly noticeable glitches.
Actions
PolyObjects can perform various actions, which are set up via linedef executors in the range from linedef type 480 to 491. Available actions include horizontal movement, rotation, and changing the visibility, translucency or tangibility of the PolyObject. The actions are set up like any other linedef executor, in a separate control sector, with a trigger linedef and an executor linedef. The tag of the executor linedef should be the PolyObject ID. For continuous movement or rotation effects that should be performed on level load, linedef type 399 can be used as the trigger.
Horizontal movement
There are four linedef types for horizontal PolyObject movement, each for slightly different purposes and with slightly different effects:
- Linedef type 480, Door Slide, is used for PolyObjects that move a certain distance and then back again, performing this action only once. The effect is controlled through the texture offsets: The front texture X offset determines the speed, the front texture Y offset determines how far it will slide (in the direction that the control linedef is facing), and the back texture X offset determines how long to wait before sliding back, in tics.
- Linedef type 482, Move, works identically to the door slide effect, except that the PolyObject won't move back. This is typically used for horizontal platforms that take the player from one point to another. It is set up the same way as linedef type 480, but the back texture X offset is not needed.
- Linedef type 483, Move and Override, is a copy of the Move linedef type that overrides other actions, i.e., it will be performed even if the PolyObject is already performing another action. If you want this effect to be executed simultaneously to another action, use this instead of linedef type 482.
- Linedef type 488, Move by Waypoints, is the most flexible and least specific movement action. With this action, you can give the PolyObject complex movement patterns and also repeat the movement indefinitely. The front texture X offset determines the speed, and front texture Y offset determines the Zoom Tube Waypoint sequence that the PolyObject will move through. The PolyObject starts at its Spawn Point and will then move to the first waypoint, followed by all the other waypoints in sequence. If Flag [5] / Slope Skew / Effect 1 is checked, it will go through the sequence in reverse. If Flag [7] / No Midtexture Skew / Effect 2 is checked, it will move back through the sequence in reverse after it is finished. If Flag [8] / Peg Midtexture / Effect 3 is checked, it will return directly to the first waypoint after it has finished the sequence. Finally, if Flag [9] / Solid Midtexture / Effect 4 is checked in addition to either [7] / No Midtexture Skew / Effect 2 or [8] / Peg Midtexture / Effect 3, it will loop the movement. This is useful for horizontal pushers when combined with the level load trigger linedef.
Note that moving PolyObjects out of the sector they spawn in might lead to rendering glitches.
Rotation
There are five linedef types for PolyObject rotation, each for slightly different purposes and with slightly different effects:
- Linedef type 481, Door Swing, is used for PolyObjects that rotate around their Anchor a certain distance and then back again, performing this action only once. If you want a PolyObject to swing like a door would, the Anchor must be placed on the side of the PolyObject that will remain stationary. The effect is controlled through the texture offsets: The front texture X offset determines the speed, the front texture Y offset determines how far it will swing in degrees, and the back texture X offset determines how long to wait before rotating back, in tics.
- Linedef type 484, Rotate Right, makes a PolyObject rotate clockwise around its Anchor. If the Anchor is not inside the PolyObject itself, it will move around it during the rotation. The front texture X offset determines the speed, while the front texture Y offset determines how far it will rotate in degrees. If Flag [9] / Solid Midtexture / Effect 4 is checked and the Y offset set to 360, it will rotate continuously.
- Linedef type 485, Rotate Right and Override, is a copy of the Rotate linedef type that overrides other actions, i.e., it will be performed even if the PolyObject is already performing another action. If you want this effect to be executed simultaneously to another action, use this instead of linedef type 484.
- Linedef type 486 and linedef type 487 work the same as the above two linedef executors, but make the PolyObject rotate counterclockwise instead.
Visibility effects
There are three linedef types that control tangibility, visibility and translucency:
- Linedef type 489, Turn Invisible and Intangible, makes a PolyObject turn invisible and intangible. If Flag [6] / Not Climbable is set, the PolyObject will only turn invisible, but stay tangible.
- Linedef type 490, Turn Visible and Tangible, makes a PolyObject turn visible and tangible. If Flag [6] / Not Climbable is set, the PolyObject will only turn visible, but stay intangible.
- Linedef type 491, Set Translucency, sets the translucency of a PolyObject. The floor height of the control sector determines how translucent it will be, with 0 being completely opaque and 1000 completely invisible.
- Linedef type 492, Fade Translucency, fades the translucency of a PolyObject gradually.
Setting up an action
As an example of how to set up a PolyObject action, we choose the most versatile and useful, but also the most complicated effect: Move by Waypoints. The first part of the setup is similar for all PolyObject actions, while the setup of the waypoints and the flag usage only pertain to this specific effect. For this tutorial we will choose a sequence of three waypoints to properly showcase how the effect flags work.
Control sector
Create a new control sector, tag one of its linedefs to the PolyObject ID and give it linedef type 488. A second linedef should be either a regular trigger linedef or , if the action should be performed on level load, linedef type 399. Now set the necessary atrributes in the sidedef properties of that linedef. The front texture X offset sets the speed; a common and moderate speed is 32. The front texture Y offset sets the waypoint sequence to use. If this is the first set of Zoom Tube Waypoints in your level, leave it as zero. For each new waypoint sequence, add 1. Each PolyObject should have its own waypoint sequence, as should every other effect that uses waypoints, such as zoom tubes or rope hangs.
- Visual steps
-
 Making a new control sector and giving one of its linedefs linedef type 488.
 -
 Giving another linedef linedef type 399.
 -
 Setting the speed and waypoint sequence.


Waypoints
For the purpose of our tutorial, place three Zoom Tube Waypoints on the map; it doesn't matter where. The Angle determines their order. The first waypoint has an Angle of 0, the second an Angle of 1, and so forth. For each new waypoint sequence, add 256 to the Angles of all waypoints belonging to it. The Z offset should be the center of the PolyObject, so if it is 128 fracunits high, the waypoints should be at 64, unless you want the PolyObject to move up or down as well. If you test the map now, the PolyObject will move from its Spawn Point to the first waypoint and then to the following ones in ascending order, until it stops at the last one. If you want it to start at the first waypoint, simply place the Spawn Point at the same spot so that they overlap.
- Visual steps
-
 Placing three Zoom Tube Waypoints.
 -
 The PolyObject in-game.


Flags usage
The flags of the control linedef control how the PolyObject will move through the waypoints. Various combinations of the flags lead to several different possibilites:
| Effect flags | Behavior | Example |
|---|---|---|
| None | From first to last waypoint | Spawn Point → Waypoint 1 → Waypoint 2 → Waypoint 3 |
| [5] / Slope Skew / Effect 1 | From last to first waypoint | Spawn Point → Waypoint 3 → Waypoint 2 → Waypoint 1 |
| [7] / No Midtexture Skew / Effect 2 | From first to last waypoint, then from last to first | Spawn Point → Waypoint 1 → Waypoint 2 → Waypoint 3 → Waypoint 2 → Waypoint 1 |
| [5] / Slope Skew / Effect 1 and [7] / No Midtexture Skew / Effect 2 | From last to first waypoint, then from first to last | Spawn Point → Waypoint 3 → Waypoint 2 → Waypoint 1 → Waypoint 2 → Waypoint 3 |
| [8] / Peg Midtexture / Effect 3 | From first to last waypoint, then directly to first | Spawn Point → Waypoint 1 → Waypoint 2 → Waypoint 3 → Waypoint 1 |
| [5] / Slope Skew / Effect 1 and [8] / Peg Midtexture / Effect 3 | From last to first waypoint, then directly to last | Spawn Point → Waypoint 3 → Waypoint 2 → Waypoint 1 → Waypoint 3 |
| [9] / Solid Midtexture / Effect 4 | Loops movement (must be used at least with either [7] / No Midtexture Skew / Effect 2 or [8] / Peg Midtexture / Effect 3) | Spawn Point → Waypoint 1 → Waypoint 2 → Waypoint 3 → Waypoint 1 → Waypoint 2 → Waypoint 3 → etc. |
Other effects
- PolyObjects can trigger linedef executors like any other sector by applying the desired trigger sector special to the PolyObject sector and tagging the sector to a trigger linedef.
- A special mechanism exists for triggering a linedef executor when a player lands on a PolyObject. To activate it, check Flag [6] / Not Climbable on the parameters linedef (the linedef with type 22). The PolyObject sector doesn't need a sector special or tag. Any trigger linedef whose tag is 32000 plus the PolyObject's ID will be triggered once a player lands on the PolyObject.
- Linedef type 30 makes certain parts of a PolyObject shift back and forth in a wave-like fashion. It is intended to be used for flags that wave in the wind.
- Linedef type 31 can be used to make a PolyObject move whenever the floor or ceiling height of a specified control sector moves, in the same fashion as a displacement plane scroller.
- Linedef type 32 can be used to make a PolyObject rotate whenever the floor or ceiling height of a specified control sector moves, in the same fashion as a displacement plane scroller.
Samples
Sample 1
- Example file: ex_ld020_polyobject.wad (MAP01)
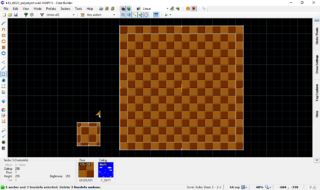
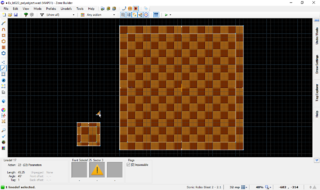
- This shows a basic PolyObject without a parameters linedef that does not render its flats and does not perform any actions.
| How to use |
|---|
|
Sample 2
- Example file: ex_ld022_polyobject_parameters.wad (MAP01)
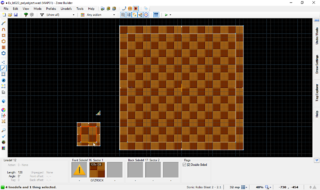
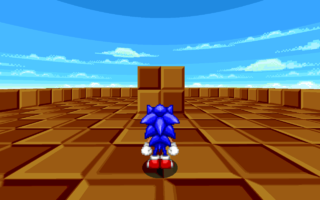
- This shows a basic PolyObject with a parameters linedef that renders its flats but still does not perform any actions.
| How to use |
|---|
|
Sample 3
- Example file: ex_ld488_polyobject_movebywaypoints.wad (MAP01)
- This shows a PolyObject that uses the Move by Waypoints effect.
| How to use |
|---|
|