Mystic Realm/Levels/Flame Rift Zone Act 1
| Single Player levels | ||
|---|---|---|
| MAPAA: Flame Rift Zone Act 1 | ||

| ||
| Emerald stages | ||
| Extra levels | ||
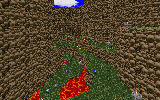
MAPAA, Flame Rift Zone Act 1, abbreviated as FRZ1, is the first act of Flame Rift Zone, the fourth zone in Mystic Realm. It is a short, if dangerous, level set in a dried-out valley filled with Crawla Commanders, Crawlas, lava lakes, and torches.
Walkthrough
This level consists of two major areas, both of which feature three independent paths that cross the area at different heights. In both cases, the lowest path is the most straightforward one, simply leading through the area and requiring you to dodge enemies and jump across pools of lava along the way. The other two paths can be considered detours, since they force you to jump back down to the lowest path at the end of the area, but they allow you to reach hidden items that are not accessible from the lowest path. Since the paths themselves are so straightforward, this walkthrough will mainly describe the layout of the level, outlining where the different paths split off and rejoin.
First area
From the starting area, walk up the steps in front of you. Here the path splits: You can either jump over the pool of lava to the right, which leads to the lowest path, or you can walk up the staircase to the left to access the two higher paths:
- Lowest path: This path is very straighforward. After a few turns, you will eventually end up at a narrow corridor where the path makes a sharp left turn and leads up a staircase. The following area contains the first Star Post.
- Middle path: After walking up the staircase, turn right immediately. You should see a trail of rings leading right. If you follow it, you can make your way forward by jumping across several ledges, all of which are at the same height. You will eventually reach a staircase leading back down to the lowest path.
- Highest path: After walking up the staircase, continue forward. After a right turn, you will walk up another staircase and come to the edge of a cliff, with another cliff at the same height in front of you. Jump to the other cliff and continue forward. You will eventually reach the edge of another cliff with no way forward but to jump down to the lowest path.
Second area
After the first Star Post, you will reach a second open area. Again there are three paths at different heights that you can take:
- Lowest path: Jump down to the floor below you. Continue forward and jump over a pool of lava to come to a cliff. Jump down again and continue until you reach the second Star Post at a left turn. If you continue from there, you will eventually reach a large pool of lava with three square platforms leading to the other side. Jump across them while avoiding the Crawlas to reach the Level End Sign.
- Middle path: As with the lowest path, jump down to the floor below you and continue until you come to a cliff. Instead of jumping down there, jump to the ledge to your left. You can continue from there across several more ledges until you reach the large pool of lava at the end of the lowest path.
- Highest path: Instead of jumping down, jump to the ledge in front of you. You can continue by jumping across several more ledges at the same height. After jumping across a square pillar with a torch, you will reach a ledge with the second Star Post. From there you can walk up a staircase and turn right to reach a ledge high above the final part of the level. Here you must jump down to the lowest path and make your way across the large pool of lava to reach the Level End Sign.
Points of interest
Extra lives
- An extra life is hidden in the lava at the point where the first area makes a sharp bend to the right. It is surrounded by a ring of rings. To collect it without getting hurt, you will need invincibility or an Elemental Shield.
- Take the highest path in the first area. After walking up the second staircase, turn around. At the bottom of the staircase, you should see a ledge protruding from the wall to your left. Jump to that ledge and from there to another ledge in front of you. Walk up to the far end of that ledge and search the wall to your right for a bustable wall. It leads to a room with an extra life behind two Eggman Monitors.
- In Sonic's emblem location.
- Take the highest path in the first area. Near the end of the path, look for a red spring hidden behind a torch. Use that spring to reach the top of the cliff to your right. At the top you will find an extra life.
- After walking up the staircase that leads to the first Star Post, look at the left wall in front of you. You should see a bustable wall that leads to a room with a Whirlwind Shield and an extra life.
- At the start of the second area, jump down and look to the right to see a torch tucked away in a corner. An extra life is hidden behind that torch.
- Take the middle path in the second area. After jumping over the area with the second Star Post on the lowest path, search the wall to your right for a bustable wall. Behind the bustable wall is a cave with two Super Ring Monitors and an extra life.
- Take the highest path in the second area. After walking up the staircase and turning right, search the wall to your right for a bustable wall. Behind the bustable wall is a cave with four ring monitors and an extra life.
Shields
- Take the highest path in the first area. After the room makes a bend to the right, look to your right for a ledge with an Attraction Shield.
- Take the highest path in the first area. After walking up the second staircase, search the wall to your left for a bustable wall. Behind it you will find an Armageddon Shield.
- Take the highest path in the first area. After walking up the second staircase, turn around. At the bottom of the staircase, you should see a ledge protruding from the wall to your left. Jump to that ledge and from there to another ledge in front of you. Walk up to the far end of that ledge to see another ledge with a diagonal yellow spring. That spring takes you to a ledge with an Elemental Shield.
Invincibility
- Take the middle path in the first area. After turning right and following the trail of rings, look between the two torches on the next ledge for a bustable wall. Behind it you will find an invincibility monitor.
Super Sneakers
- Take the lowest path in the first area. Where the room makes a sharp bend to the right, search the wall to your right for a bustable wall. Behind it you will find a Super Sneakers monitor.
Emblem locations
Sonic
Take the highest path in the first area. After walking up the second staircase, turn around. At the bottom of the staircase, you should see a ledge protruding from the wall to your left. Jump to that ledge and from there to another ledge in front of you. Walk up to the far end of that ledge to see another ledge with a diagonal yellow spring. That spring takes you to a ledge with an Elemental Shield and another spring. Take that spring to reach the top of the cliff. Behind the torch at the far end of the cliff you will find the emblem as well as an extra life.
Tails
When you reach the second area, after the first Star Post, jump down directly in front of you and look for a spring in the left corner, next to the ledge you jumped from. The emblem floats directly above the spring.
Knuckles
At the staircase directly before the first Star Post, which divides the two areas of the level, climb up the walls near the middle of the staircase to find the emblem floating at the very top of the room, between the walls.
Technical data
| |||||||||||||||||
| ||||||||||||||||||||
| Things | |
|---|---|
| Player starts | Occurrences |
| Player 1 Start | 1 |
| Match Start | 39 |
| Enemies | Occurrences |
| Crawla (Blue) | 74 |
| Crawla (Red) | 87 |
| Crawla Commander | 7 |
| Rings and weapon panels | Occurrences |
| Ring | 196 |
| Super Ring Monitor (10 Rings) | 24 |
| Total rings | 436 |
| Monitors | Occurrences |
| Attraction Shield Monitor | 1 |
| Armageddon Shield Monitor | 1 |
| Whirlwind Shield Monitor | 1 |
| Elemental Shield Monitor | 1 |
| Super Sneakers Monitor | 1 |
| Invincibility Monitor | 2 |
| Extra Life Monitor | 8 |
| Eggman Monitor | 4 |
| Miscellaneous | Occurrences |
| Level End Sign | 1 |
| Star Post | 3 |
| Hazards | Occurrences |
| Torch | 106 |
| Springs and fans | Occurrences |
| Yellow Spring | 3 |
| Red Spring | 2 |
| Diagonal Yellow Spring | 1 |
| Scenery | Occurrences |
| CEZ Flower | 76 |
