Tortured Planet/Levels/Spacewalk Zone Act 2
| This article or section is incomplete. It doesn't have all of the necessary core information on this topic. Please help the SRB2 Wiki by finishing this article. |
| Single Player levels | ||
|---|---|---|
| MAPBM: Spacewalk Zone Act 2 | ||

| ||
|
SSZ | ||
| Match stages | ||
| Secret levels | ||
| Tortured Archives | ||
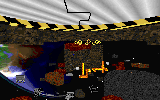
MAPBM, Spacewalk Zone Act 2, is the second act of the eighth zone in Tortured Planet, and the longest level in the pack. The level takes place in an asteroid field, and the player must alternate between hopping across them and exploring their interiors. Just like Act 1, Act 2 is also full of space junk and constant gravity flips.
Walkthrough
Points of interest
Emblem locations
Sonic
In the section where you have to use the giant groups of tubes to balance between two death pits, the emblem is located high up on the far wall. You will have to approach it with precisely the right angle and force to collect it; it is likely that you will die a few times in the attempt.
Tails
This emblem is in plain sight on a platform built on the red/blue grid maze just after the room with the enlargement machine. However, it is surrounded by an instant kill grid, so you can't just jump forward to collect it. What you have to do instead is get through the maze, then fly around the outside of it. There is a platform built into the side of the maze, which is way too far below the top to see when you're actually in the grid. The black opening leading into the structure from this platform is a teleporter which comes out in a pipe positioned directly above the emblem. Don't move sideways while you fall, or you may hit the invisible instant kill grid. You should land right on top of the emblem. To escape safely, just fly upward back towards the pipe, and it will teleport you back.
Knuckles
In the space station where you have to flip gravity and go back through the previous path on the ceiling, continue as normal until you reach the room with the red and blue grid tunnels for the second time, with gravity reversed, but do not go into them. Instead, keep backtracking until you end up in the open asteroid "cliff" section just before. From there, climb down (or, relative to your orientation, up), and to the side, and you should find another tunnel with a red grid floor. The ceiling is safe to walk on, so if you actually took the whole route and got reversed gravity, you shouldn't be in any danger. The tunnel ultimately leads to a small room above the aforementioned red and blue grid tunnel room. There is a grate in the floor that looks down into the room. There are also some Super Rings, and the emblem. Once you collect the emblem, you can press the button in this room to make the grate disappear. There is a spring which you can use to end up back in that room.
Technical data
| |||||||||||||||||
| ||||||||||||||||||||
